Starting Out: Your first trad lead climb on rock
- Sunday 6th October 2019
by Libby Peter
Are You Ready to Lead?
The exhilaration of being on the sharp end of the rope is difficult to measure because it tends to be tainted with other, less positive emotions, which at the time threaten to overwhelm you. It’s often only afterwards that you’re able to utter, ‘that was brilliant!’ when only minutes before you were scared, unsure, lacking in confidence and feeling like you were climbing really badly. Be reassured that this is a perfectly normal pattern and one of the side-effects of leading that makes it both repulsive and compelling in equal measure. In this article we’re looking at approaches to leading and trying to decide if the moment is right, for you.
 A typical ledge-festooned V Diff at Hen Cloud in Staffordshire, the ideal type of route to take your first leading steps outdoors. Photo: Mike Robertson
The Traditional Approach
These days there are two approaches to getting started leading. The traditional approach, and the one I certainly took, is to start leading early on in your climbing days so that you’ve perhaps seconded a few routes or spent time on harder scrambles and therefore have an idea what’s in store. During this type of apprenticeship you stick to easy graded traditional climbs working things out as you go - I say traditional largely because there is a distinct scarcity of easy graded sport routes in the UK. With this approach you are arguably quite safe, because although you may not have much leading experience, you only tackle things that you know you’re not going to fall off, perhaps because you’ve been there as a second in the past. With this measured approach common sense will (nine times out of 10) prevail. During this time you’ll most likely be on easy angled or stepped climbs, which on the one hand is great because you do the harder climbing in short bursts with pauses for thought on the ledges in between. The downside is that if you do happen to slip off there’s a high chance that you’ll hit something on your way down. So what can you do to minimise the risks?
Buy Yourself Time
Choose routes that give you time to work it all out - chunks of climbing followed by a ledge to stand on and place the next runner. If you’re comfortable you’re more likely to get a good placement. Take a look at the photo of me on Red Wall (Severe) in North Pembroke; I’ve got all my weight on my feet and can see easily into the crack while I place the runner.
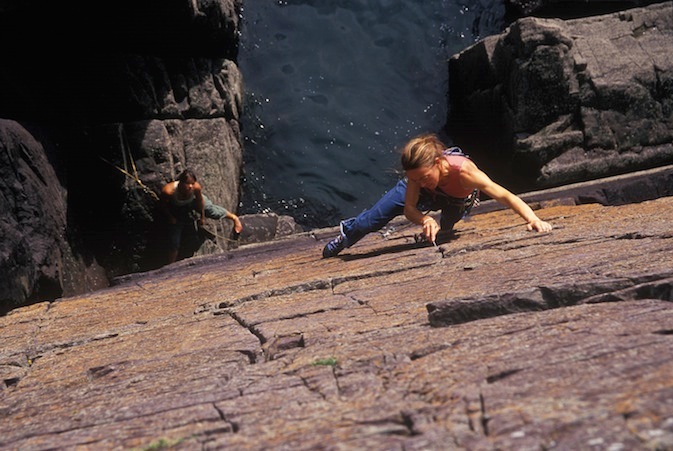
 Taking time and care over the runners on Red Wall (Severe), North Pembroke. Photo: Mike Robertson
Obvious
Find routes with an obvious and large end point so you know the climbing has finished and can move around safely while you find anchors and construct the belay. Once again you don’t want to rush.
Progressions
To start with choose quiet crags and routes so you don’t have climbers snapping at you heels as this makes you rush or, at the very least, feel flustered. As you progress you’ll soon find yourself on mega classics.
The Modernist's Approach
The second approach to starting leading is if you’ve been climbing indoors for some time and are now transferring outside. If you’ve notched up fitness and experience indoors you could feasibly go straight in at VS or above as you’ll cope physically with the steeper terrain quite easily. But, with limited real rock experience, you could come unstuck with route finding, placing good protection (on trad routes), spotting holds (feet in particular) as well as those techniques harder to learn indoors such as jamming and laybacking. The good news is that on the steeper routes there are fewer big ledges to hit; the bad news is there is more chance you may fall off on gear that is less than perfect. Apart from dropping the grade right down and slotting in with traditionalist approach above you can adopt some safety tactics:
1. Place Lots of Runners
You simply can’t place enough runners when you’re starting out. That way if only half are good you’ll be covered. Placing runners in slightly awkward positions, even if you’re not worried about the moves, is great practice for harder routes to come.
2. Place High Runners
Though it isn’t always super efficient, place those high, above the head, runners to minimise the length of fall. You’ll feel way more confident too.
3. Practice Placing Protection
Easier said than done but by fiddling pieces of gear into the rock while you’re killing time at the base of the crag and weighting (carefully) you’ll get a feel for what works best before you step on a route.
Are You Ready to Lead?
To get back to the nitty-gritty of when to go for it; well if you’re a patient traditionalist who has served a second’s apprenticeship and are naturally quite cautious, I would say pick something you’ve done before and get on with it now. If you’re in the transferring from the inside group and have fitness and indoor leads under your belt I would advise a little caution. Perhaps add an intermediate step of sport climbing during which you focus on climbing slowly and getting really comfortable with clipping bolts and rope. Be prepared to climb at a grade far lower than you’re technically capable of.
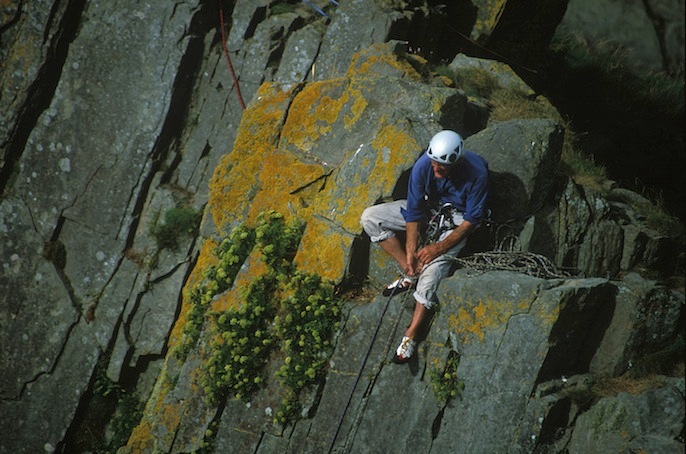
 For your first leads find routes with obvious end points and space to safely set up anchors. Here a climber is belaying comfortably at the top of Lost Horizon (VS 5a), Baggy Point in North Devon. Photo: Mike Robertson
Ask for Help
Whichever approach to starting out leading you take don’t hold back from getting some helpful advice along the way. Tap into the knowledge bank of your more experienced friends or find a local climbing club that will keep you under their wing for a while. If you opt for some more formal instruction check that you are booking either a qualified Mountaineering Instructor who holds the Mountaineering Instructor Award (MIA) or Mountaineering Instructor Certificate (MIC), or a qualified British Mountain Guide (BMG).

